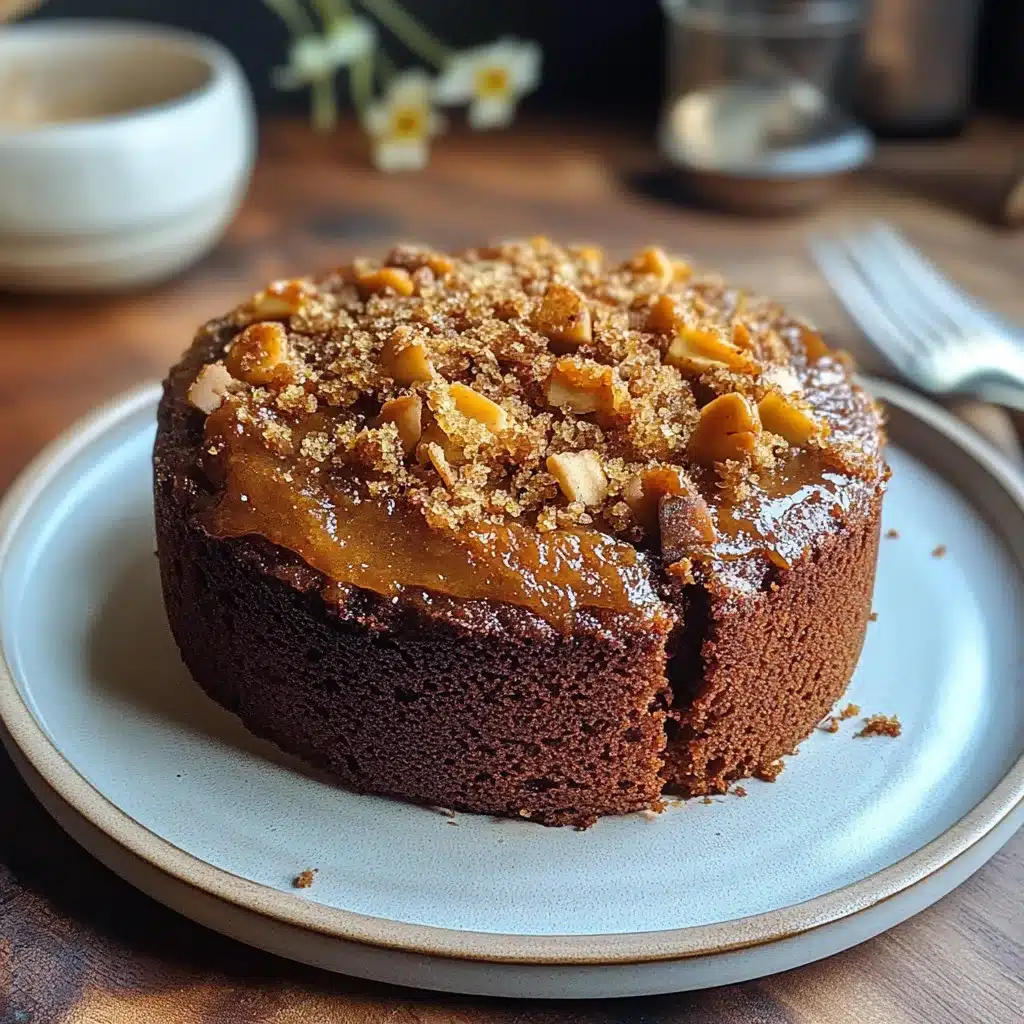

Apple Crisp is a delightful dessert that captivates your taste buds with a perfect blend of sweet and tart. The warm, cinnamon-infused apples contrast beautifully with the crunchy oat topping, creating an amazing harmony that’s hard to resist. This classic dish not only brings comfort but also evokes nostalgia for many who remember the comforting aroma wafting through their kitchens on chilly autumn evenings. Whether served warm with a scoop of vanilla ice cream or enjoyed on its own, Apple Crisp is a timeless favorite that anyone can make.
In this guide, we will explore why you’ll absolutely love this recipe and break down the preparation steps that lead to success. From the comforting spices to the satisfying crunch, every detail contributes to an amazing experience. Plus, this recipe is simple enough for even the most novice cooks to master, which makes it a perfect choice for gatherings or cozy nights in. You’ll learn about the preparation and cooking time, the essential ingredients, easy-to-follow instructions, and tips on how to serve this lovely dish. Let’s dive into the wonderful world of Apple Crisp!
Why You’ll Love This Recipe
Apple Crisp is a crowd-pleasing treat that has something for everyone. Here are incredible reasons to fall in love with this recipe:
1. Simplicity: The ingredients are straightforward and can be found in most kitchens.
2. Versatile: You can use any variety of apples you have on hand and even add nuts or dried fruits for a twist.
3. Healthy Option: While it’s a dessert, the use of fresh apples offers health benefits along with the enjoyment.
4. Perfect for Any Season: Although it shines in the fall, it’s delightful to enjoy all year round.
5. Easy Instructions: The steps are clear and simple, making it accessible for anyone.
6. Crowd Favorites: Family and friends will love the warm, cozy flavors, making it a great dish for gatherings.
With these advantages in mind, it’s clear why Apple Crisp remains a beloved recipe. Each bite echoes warmth, comfort, and indulgence!
Preparation and Cooking Time
Creating your Apple Crisp involves a straightforward process that doesn’t take long at all. Here’s a breakdown of your time commitment:
– Preparation Time: 20 minutes
– Cooking Time: 35-40 minutes
– Cooling Time: 10 minutes
These times may vary slightly depending on your personal pace and familiarity with the recipe, but this framework should give you an accurate estimate.
Ingredients
– 6 cups of peeled and sliced apples (such as Granny Smith or Honeycrisp)
– 1 cup granulated sugar
– 1 tablespoon lemon juice
– 1 teaspoon ground cinnamon
– ½ teaspoon ground nutmeg
– 1 cup rolled oats
– 1 cup all-purpose flour
– ½ cup packed brown sugar
– ½ cup unsalted butter, softened
– ¼ teaspoon salt
Step-by-Step Instructions
Follow these easy steps to create a mouthwatering Apple Crisp that will have everyone asking for seconds!
1. Preheat the Oven: Set your oven to 350°F (175°C).
2. Prepare the Apples: In a large bowl, combine the sliced apples with granulated sugar, lemon juice, cinnamon, and nutmeg. Mix well to ensure all the apples are coated.
3. Transfer to Baking Dish: Pour the apple mixture into a greased 9×13 inch baking dish.
4. Make the Topping: In a separate bowl, combine rolled oats, flour, brown sugar, softened butter, and salt. Mix until crumbly.
5. Spread the Topping: Evenly distribute the oat mixture over the apple filling in the baking dish.
6. Bake: Place in the preheated oven and bake for 35-40 minutes, or until the apples are tender and the topping is golden brown.
7. Cool: Remove from the oven and let cool for about 10 minutes before serving.
This simple process leads to a fantastic dessert that encapsulates the essence of autumn!
How to Serve
When it comes to serving your Apple Crisp, a thoughtful approach can elevate the experience:
1. Presentation: Serve it warm in individual ramekins or a large dish. Garnishing with fresh mint can add a touch of elegance.
2. Accompaniments: Pair your Apple Crisp with vanilla ice cream, crème fraîche, or whipped cream for a rich, indulgent experience.
3. Slice Size: Offer generous servings to guests, ensuring everybody can enjoy a hearty portion.
4. Beverage Pairing: Serve with a hot cup of spiced cider or a light dessert wine to enhance the flavors.
By considering these presentation tips, you’ll create a memorable moment for everyone at the table. Enjoy your delicious Apple Crisp!
Additional Tips
– Use Fresh Apples: Selecting high-quality, fresh apples is crucial for achieving the best flavor in your Apple Crisp.
– Experiment with Spices: Feel free to add nutmeg, ginger, or even cardamom to the apple mixture for added depth of flavor.
– Serve Immediately: For the best experience, serve Apple Crisp warm right out of the oven while the topping is still crispy.
Recipe Variation
Get creative with your Apple Crisp by trying these variations:
1. Gluten-Free Option: Substitute all-purpose flour with a gluten-free flour blend to make it suitable for gluten-sensitive individuals.
2. Nutty Crunch: Add chopped nuts, such as walnuts or pecans, to the topping for an extra crunch and a delightful nutty flavor.
3. Berry Blend: Incorporate mixed berries like blueberries or raspberries along with apples for a burst of color and taste.
Freezing and Storage
– Storage: Store any leftover Apple Crisp in an airtight container in the refrigerator. It should last about 3-4 days.
– Freezing: You can freeze Apple Crisp by wrapping it tightly in plastic wrap and aluminum foil. It will hold its quality for up to 3 months. Let it thaw overnight in the fridge before reheating.
Special Equipment
To make your Apple Crisp, you will need the following kitchen tools:
– A large mixing bowl for combining apple ingredients
– A separate bowl for preparing the topping
– A greased 9×13 inch baking dish for baking
– A mixer or pastry cutter for properly blending the topping ingredients
– A spoon or spatula for mixing
Frequently Asked Questions
What types of apples are best for Apple Crisp?
Granny Smith and Honeycrisp apples are popular choices because they provide a great balance of sweetness and tartness.
Can I prepare Apple Crisp in advance?
Absolutely! You can assemble the Apple Crisp up to a day ahead, cover it, and keep it in the refrigerator. Just bake it right before serving.
How do I reheat leftovers?
To reheat, place individual servings in the microwave for about 30 seconds or warm the entire dish in the oven at 350°F (175°C) for 10-15 minutes.
Is it feasible to make Apple Crisp in smaller portions?
Yes! You can easily scale down the recipe to make individual ramekin-sized portions for guests or smaller servings.
Can I use frozen apples?
While fresh apples are recommended, you can use frozen apples. Just make sure to thaw and drain any excess moisture before mixing them with other ingredients.
Conclusion
In conclusion, Apple Crisp is not just a dessert; it’s a cherished experience that combines simplicity with delightful flavors. Its warm, comforting qualities make it perfect for any occasion, whether it’s a family dinner or a gathering with friends. The harmonious balance between sweet apples and crunchy topping ensures that it will be a hit with everyone. Don’t hesitate to use this recipe as a foundation for experimenting with your unique twists. With its approachable steps and mouthwatering result, Apple Crisp will surely become a staple dessert in your home.

Apple Crisp: An Incredible Ultimate Recipe for Dessert Lovers
- Total Time: 0 hours
Ingredients
– 6 cups of peeled and sliced apples (such as Granny Smith or Honeycrisp)
– 1 cup granulated sugar
– 1 tablespoon lemon juice
– 1 teaspoon ground cinnamon
– ½ teaspoon ground nutmeg
– 1 cup rolled oats
– 1 cup all-purpose flour
– ½ cup packed brown sugar
– ½ cup unsalted butter, softened
– ¼ teaspoon salt
Instructions
Follow these easy steps to create a mouthwatering Apple Crisp that will have everyone asking for seconds!
1. Preheat the Oven: Set your oven to 350°F (175°C).
2. Prepare the Apples: In a large bowl, combine the sliced apples with granulated sugar, lemon juice, cinnamon, and nutmeg. Mix well to ensure all the apples are coated.
3. Transfer to Baking Dish: Pour the apple mixture into a greased 9×13 inch baking dish.
4. Make the Topping: In a separate bowl, combine rolled oats, flour, brown sugar, softened butter, and salt. Mix until crumbly.
5. Spread the Topping: Evenly distribute the oat mixture over the apple filling in the baking dish.
6. Bake: Place in the preheated oven and bake for 35-40 minutes, or until the apples are tender and the topping is golden brown.
7. Cool: Remove from the oven and let cool for about 10 minutes before serving.
This simple process leads to a fantastic dessert that encapsulates the essence of autumn!
- Prep Time: 20 minutes
- Cook Time: 35-40 minutes
Nutrition
- Serving Size: 8
- Calories: 250 kcal
- Fat: 10g
- Protein: 2g