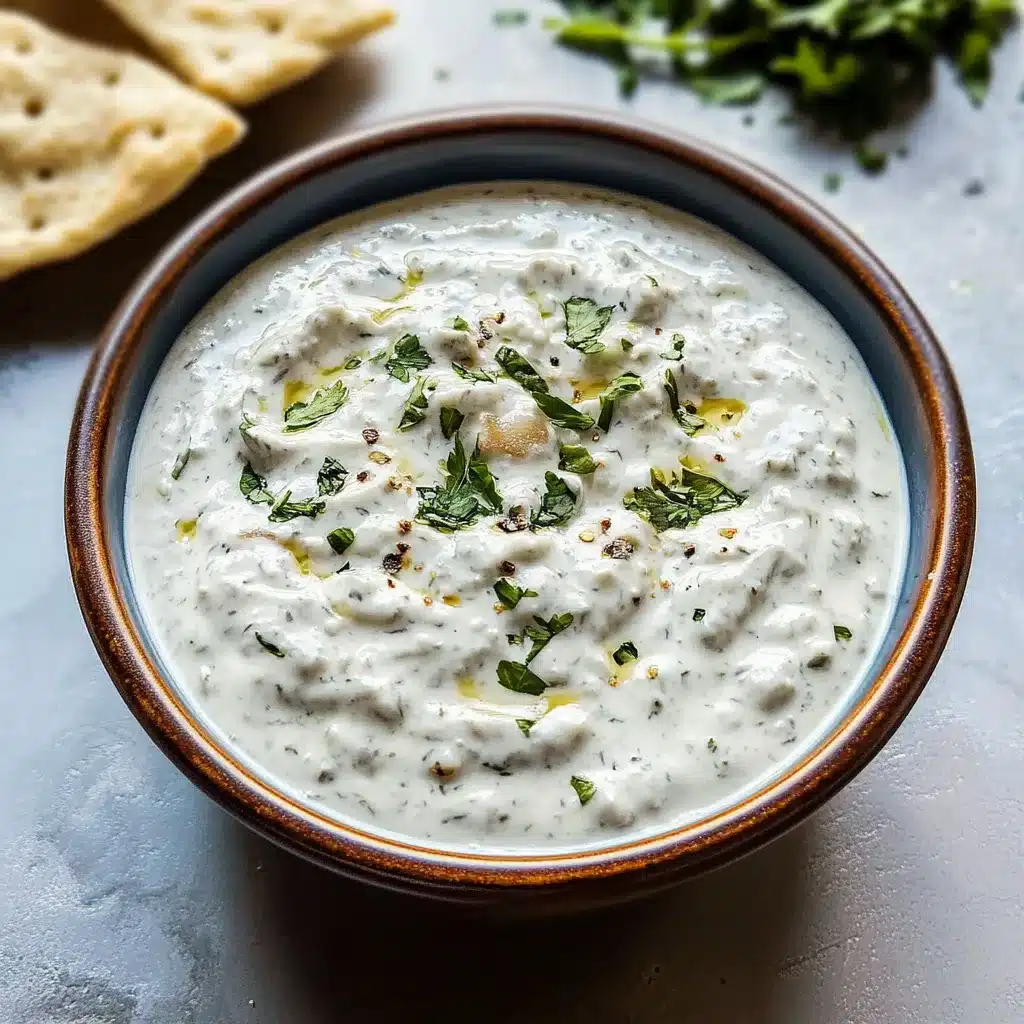
Raita is an incredible Indian yogurt condiment that transforms any meal into a culinary adventure. Known for its cooling properties and rich flavors, raita is a staple in Indian cuisine. It complements a variety of dishes, from spicy curries to savory biryanis, offering a delightful contrast that enhances your dining experience. Whether you’re a seasoned food lover or a curious beginner, raita is bound to impress with its refreshing taste and versatility.
The charm of raita lies not only in its flavors but also in its simplicity. This condiment is easy to whip up, making it a popular choice for both everyday meals and festive gatherings. If you’ve ever craved something cool and creamy to balance your spicy dishes, raita is the answer.
In this article, we will explore the reasons you’ll love preparing raita, discuss the time it takes to get it ready, delve into the necessary ingredients, share a step-by-step guide to craft the perfect raita, and illustrate how to serve it for maximum impact. Whether it’s a family dinner or a festive celebration, having this amazing condiment at your table is an opportunity to elevate your meal.
Why You’ll Love This Recipe
Raita is not just a basic condiment; it’s an experience that brings joy to every meal. Some reasons why you’ll adore this recipe include:
1. Cooling Sensation: Raita cools down spicy dishes, making it a perfect companion for fiery curries.
2. Nutritious and Healthy: Made primarily from yogurt, raita is rich in probiotics, calcium, and protein, making it a healthy addition to your diet.
3. Versatile Uses: Whether as an appetizer, side dish, or dip, raita works for various occasions and meals.
4. Quick and Easy to Prepare: In less than 15 minutes, you can have homemade raita ready for serving.
5. Easily Customizable: You can add various ingredients like fruits, herbs, or spices to personalize your raita.
6. Aesthetic Appeal: The vibrant colors and creamy texture of raita draw in guests, adding visual appeal to your dining table.
Once you try raita, its delightful flavors and textures will make it a regular feature in your kitchen!
Preparation and Cooking Time
Preparing raita is quick and efficient, allowing you to focus on other components of your meal. Here’s a breakdown of the time you’ll need:
– Preparation Time: 10 minutes
– Chilling Time: 15 minutes minimum (optional but recommended)
– Total Time: 25 minutes
These times are flexible and can vary depending on personal preferences and modifications.
Ingredients
– 2 cups plain yogurt
– 1 medium cucumber, grated
– 1 small red onion, finely chopped
– 1 medium tomato, diced
– 1-2 green chilies, finely chopped (optional)
– 2 tablespoons fresh cilantro or mint, chopped
– 1 teaspoon roasted cumin powder
– Salt to taste
– Black pepper to taste
– A dash of red chili powder (optional)
Step-by-Step Instructions
Creating raita is straightforward and rewarding. Follow these simple steps to prepare your refreshing condiment:
1. Prepare the Yogurt: In a mixing bowl, whisk the plain yogurt until smooth and creamy.
2. Add the Vegetables: Incorporate the grated cucumber, chopped onion, diced tomato, and green chilies into the yogurt. Mix well.
3. Season: Add roasted cumin powder, salt, and black pepper to taste. You can adjust the seasoning based on your preferences.
4. Mix Well: Stir everything together until the mixture is uniform in color and texture.
5. Garnish: Fold in the chopped cilantro or mint to enhance the flavor and presentation.
6. Chill (Optional): To allow the flavors to meld, cover the bowl and refrigerate the raita for at least 15 minutes before serving.
7. Serve: Transfer the raita to a serving bowl, garnishing it with an extra sprinkle of cumin powder or a few herb leaves for a finishing touch.
With these steps, your raita will be ready to enjoy!
How to Serve
Serving raita elegantly can elevate your dining experience. Consider these tips when presenting your delicious condiment:
1. Presentation Bowl: Use a colorful or decorative bowl to enhance visual appeal. A simple ceramic dish can work wonders in making the dish stand out.
2. Pairing with Meals: Raita pairs exceptionally well with spicy dishes like biryani and tandoori chicken, offering a cooling effect.
3. Highlighting Freshness: Top the raita with a sprinkle of fresh herbs or a dash of cumin powder for added flair and freshness.
4. Accompaniments: Serve raita alongside crispy papadums, naan, or with assorted snacks like samosas for a complete experience.
5. Chilled Servings: Ensure the raita is chilled before serving to maximize its refreshing qualities.
By following these serving tips, you can create a memorable dining experience, allowing the amazing flavors of raita to shine alongside your meal!
Additional Tips
– Use Fresh Ingredients: Fresh vegetables enhance the flavor of your raita. Opt for firm cucumbers and vibrant herbs.
– Experiment with Texture: For crunch, consider adding grated carrots or chopped bell peppers. It’ll elevate both taste and presentation.
– Consider Herbs and Spices: In addition to the usual cilantro or mint, try adding a pinch of fresh dill for a unique twist.
– Taste Before Serving: Always taste your raita before serving. Adjust the salt and spices according to your preference for the best flavor.
– Chill Thoroughly: For optimal taste, chill the raita for at least 30 minutes. This allows the flavors to blend beautifully.
Recipe Variation
Feel free to get creative! Here are some variations of raita to try:
1. Fruit Raita: Add diced mango, pineapple, or pomegranate seeds for a fruity take on raita. It provides a sweet contrast to spicy dishes.
2. Beetroot Raita: Incorporate shredded boiled beetroot for a vibrant color and earthy flavor. This makes the raita visually stunning.
3. Spicy Raita: Increase the heat by adding chopped green chilies or sprinkle in some chaat masala for extra flavor.
4. Coconut Raita: Mix in some grated fresh coconut for a tropical twist. The coconut adds sweetness and texture.
5. Avocado Raita: Blend in ripe avocado for a creamy, nutritious alternative. This version is rich in healthy fats.
Freezing and Storage
– Storage: Keep raita in an airtight container in the refrigerator. It can stay fresh for up to 3-4 days.
– Freezing: While fresh raita is best, you can freeze it if necessary. Store it in a freezer-safe container for up to a month. Thaw it overnight in the fridge before consuming.
Special Equipment
Preparing raita is simple, but having the right tools can help streamline the process:
– Mixing Bowls: Use a medium bowl for mixing and a larger one for chilling if needed.
– Grater: A box grater works wonders for shredding cucumbers and other veggies.
– Whisk: A whisk helps achieve a smooth and creamy yogurt base effortlessly.
– Kitchen Knife: Keep a sharp knife handy for chopping onions and tomatoes efficiently.
Frequently Asked Questions
Can I make raita a day in advance?
Yes, raita can be made ahead of time. Just be sure to store it in the refrigerator and give it a good stir before serving.
Is raita suitable for people with lactose intolerance?
You can use lactose-free yogurt as a substitute. This way, those with lactose intolerance can enjoy raita too!
What can I use instead of yogurt for a non-dairy option?
Coconut yogurt or another plant-based yogurt can be a great substitute for those avoiding dairy.
Can I add more vegetables to my raita?
Absolutely! Feel free to customize with different vegetables like carrots, bell peppers, or even boiled potatoes.
Does raita get better as it sits?
Yes, allowing raita to chill for longer helps the flavors meld together, enhancing the overall taste.
Conclusion
Raita is a uniquely refreshing Indian yogurt condiment that not only complements various dishes but also adds a delightful and cooling contrast to spicy meals. Its versatility, quick preparation time, and health benefits make it a beloved staple in Indian cuisine. By experimenting with different ingredients and serving styles, you can create your signature raita that will excite any palate. Whether you’re preparing a family meal or hosting a festive gathering, raita is sure to be a hit. Enjoy the journey of making this flavorful condiment!

Raita: An Amazing Ultimate Indian Yogurt Condiment You Must Try
- Total Time: 15 minutes
Ingredients
– 2 cups plain yogurt
– 1 medium cucumber, grated
– 1 small red onion, finely chopped
– 1 medium tomato, diced
– 1-2 green chilies, finely chopped (optional)
– 2 tablespoons fresh cilantro or mint, chopped
– 1 teaspoon roasted cumin powder
– Salt to taste
– Black pepper to taste
– A dash of red chili powder (optional)
Instructions
Creating raita is straightforward and rewarding. Follow these simple steps to prepare your refreshing condiment:
1. Prepare the Yogurt: In a mixing bowl, whisk the plain yogurt until smooth and creamy.
2. Add the Vegetables: Incorporate the grated cucumber, chopped onion, diced tomato, and green chilies into the yogurt. Mix well.
3. Season: Add roasted cumin powder, salt, and black pepper to taste. You can adjust the seasoning based on your preferences.
4. Mix Well: Stir everything together until the mixture is uniform in color and texture.
5. Garnish: Fold in the chopped cilantro or mint to enhance the flavor and presentation.
6. Chill (Optional): To allow the flavors to meld, cover the bowl and refrigerate the raita for at least 15 minutes before serving.
7. Serve: Transfer the raita to a serving bowl, garnishing it with an extra sprinkle of cumin powder or a few herb leaves for a finishing touch.
With these steps, your raita will be ready to enjoy!
- Prep Time: 15 minutes
- Cook Time: 0 minutes
Nutrition
- Serving Size: 4
- Calories: 150 kcal
- Fat: 10g
- Protein: 8g